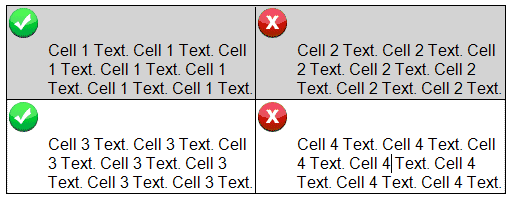
Recently, a client asked about a way to create cell content that contains an image to the left while having the text indented the width of the image. Below is a solution, without using embedded tables in Flare.
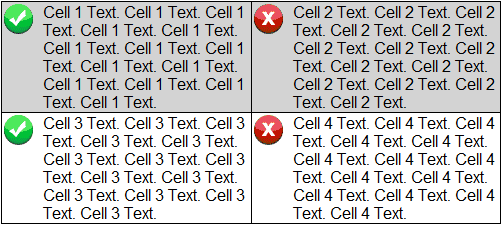
Notice in the screenshot below the image is in the upper left of the cell and the text starts at the same line without wrapping. Again, this used to be done by simply embedding a 2 column by 1 row table inside each cell, placing the image in the left column and the text in the right column. Now we'll show you how to achieve this look by using two styles.
What you will need:
- A Flare Project with a topic open in the editor with a table inserted in it
- A couple of small, thumbnail sized images
- An Image Style
- A Paragraph Style
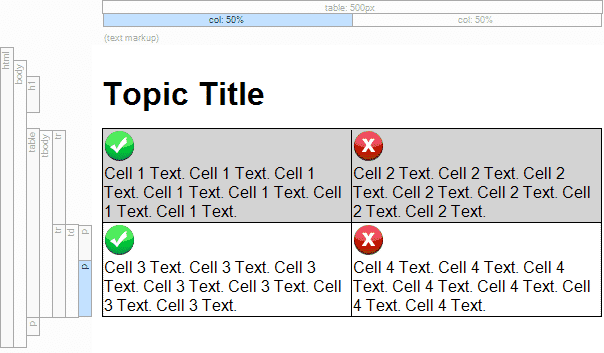
We'll start by inserting a 2x2 table in your topic. We set the width to 500px and selected the "Rows" table style, but this is not necessary. We'll then add our images, another paragraph that contained our text and you should have something like this:
Notice in the Block Bars that there are two paragraphs in the cells. One contains the image and the other contains the text.
Next we want to create two styles; one for the image and one for the paragraph.
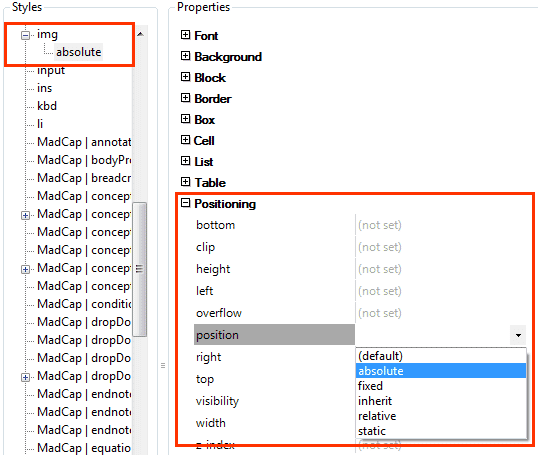
Image Style
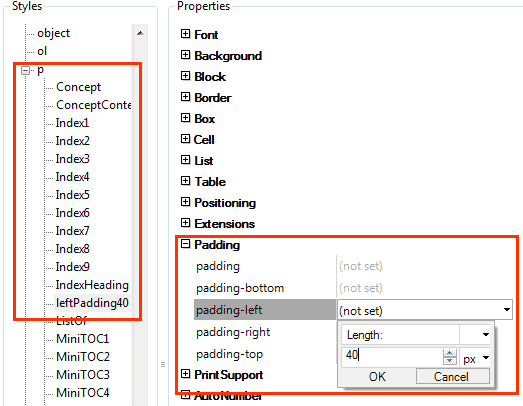
Paragraph Style
- Select the 'p' style in the style list
- Right-click it and add a class (we named the class "leftPadding40")
- Select the class "leftPadding40"
- In the Properties side, expand "Padding"
- Set the "padding-left" value to "40px" (this may vary depending on the size of the image you used)
- Click on to another field and Save
Applying the styles to the table content
- Right-click each image and apply the "img.absolute" class to it
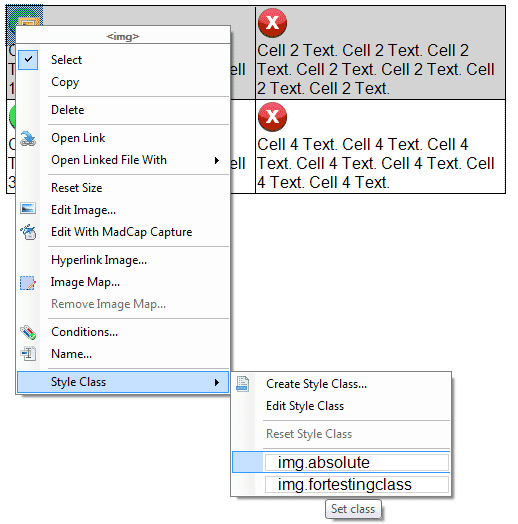
- Right-click on each of the Paragraph Block Bars that contain the text and apply the "p.leftPadding40" class (Do Not apply this class to the paragraph that contains the images)
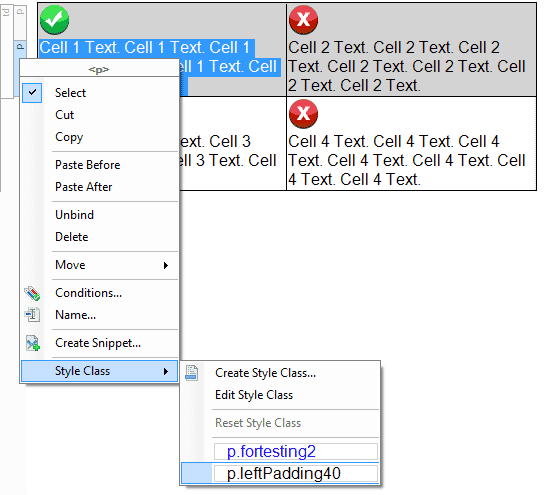
When you are done you should have a table that looks like this in the Topic Editor:
If you are outputing the topic to any of Flare's web outputs, the table will look great in the output (as it does below).
For the time being, however, the print outputs do not support these steps.


