This guest blog post was written by Jack DeLand. Jack has provided Help projects and/or Help authoring training to Fortune 50 companies around the world for over 30 years. He specializes in MadCap Flare development and resides in Ypsilanti, a small city next to Ann Arbor, Michigan.
Abstract
A simple Show/Hide Table of Contents (ToC) solution has long been a holy grail for lovers of MadCap Flare’s side navigation layout. This pre-built example includes JavaScript and icons embedded in a topic toolbar skin.
All Users—Always test on a “throwaway” copy of your project before making any wholesale changes.
Beginning MadCap Flare Users—If you’re a beginning Flare user or in a hurry to test, unzip the completed sample project linked here and build your own files and functionality upon this base.
See “Starting from Scratch” below.
Experienced MadCap Flare Users— If you’re an experienced Flare user and want to modify an existing project, unzip the completed sample project linked here and copy components from it to modify your own. Changes include:
- Adding the custom toolbar to a template page
- Editing a style sheet
See “Modifying an Existing Project” below.
Why Hide?
I like the precision and ease of use of a left-side navigation scheme, but sometimes I prefer a simple, uncluttered layout with no distractions. Compare these two examples of the same page (https://www.howtoreadpoe.com/content/h-autography/autography_05.htm):
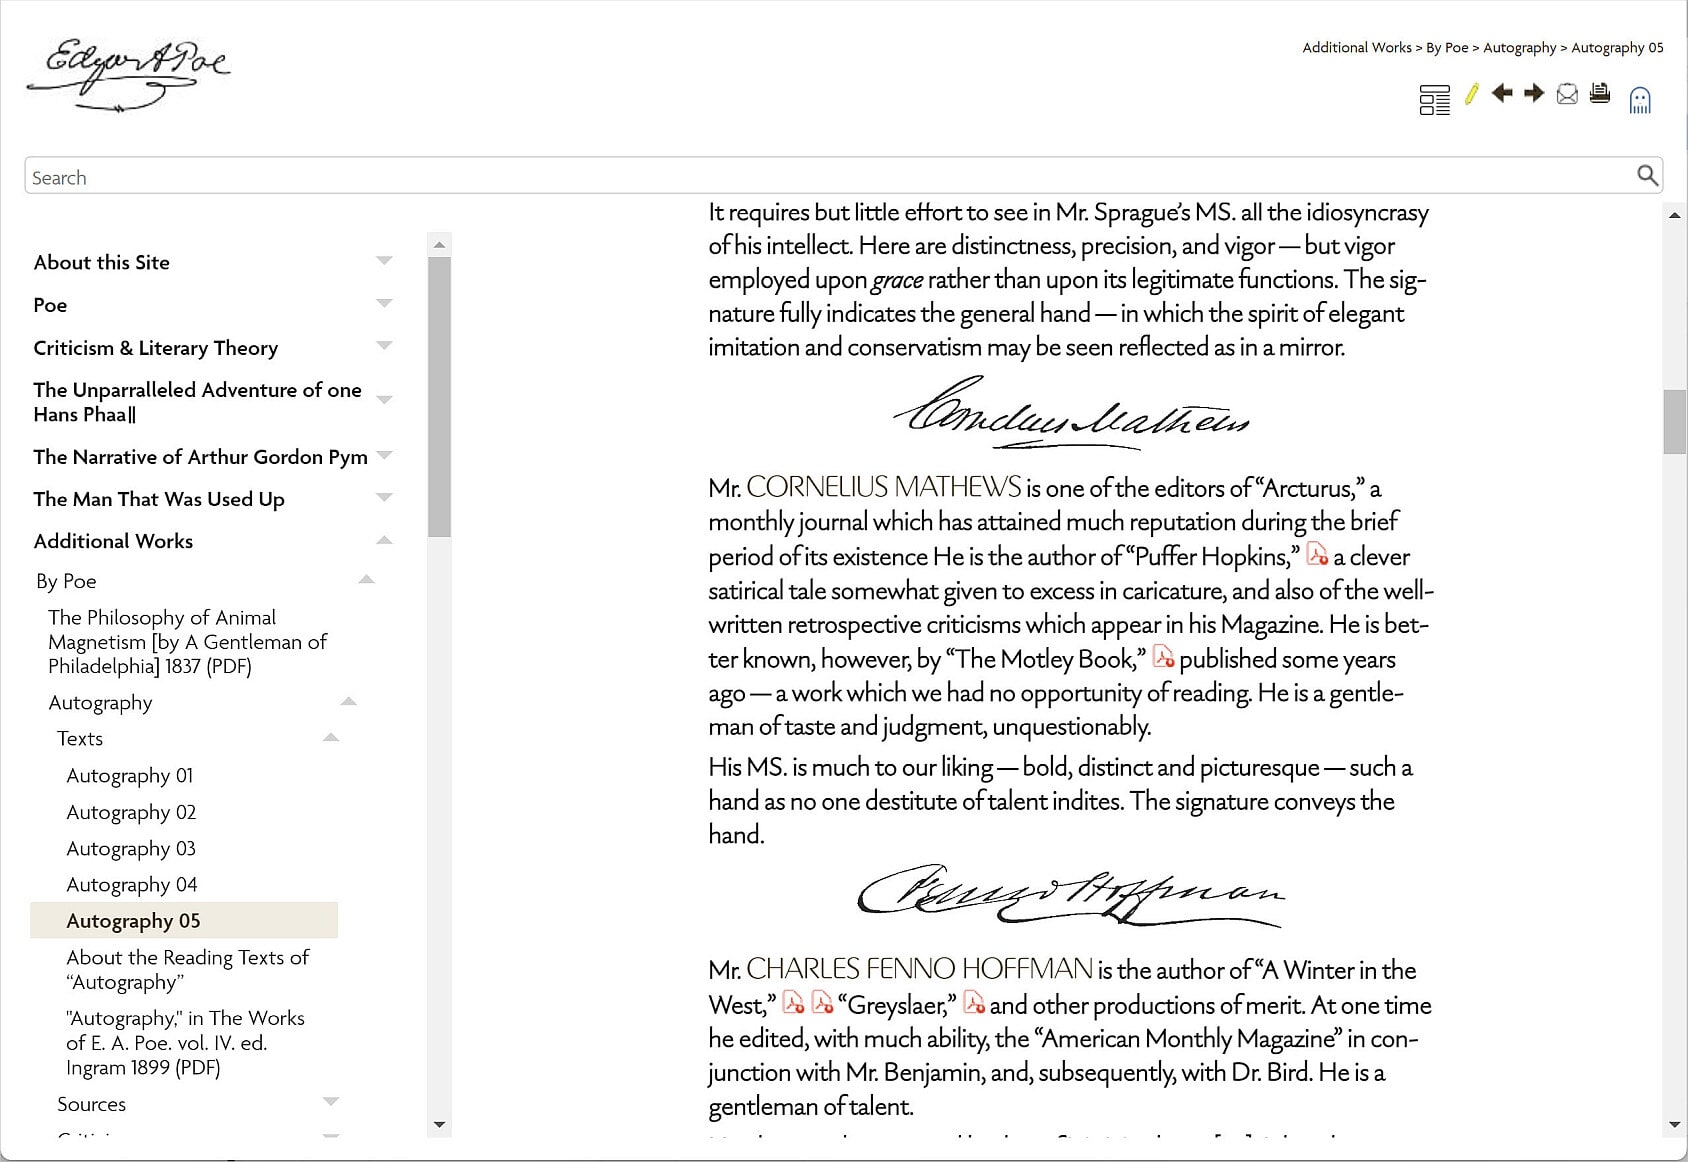
Informative, but busy.
and:
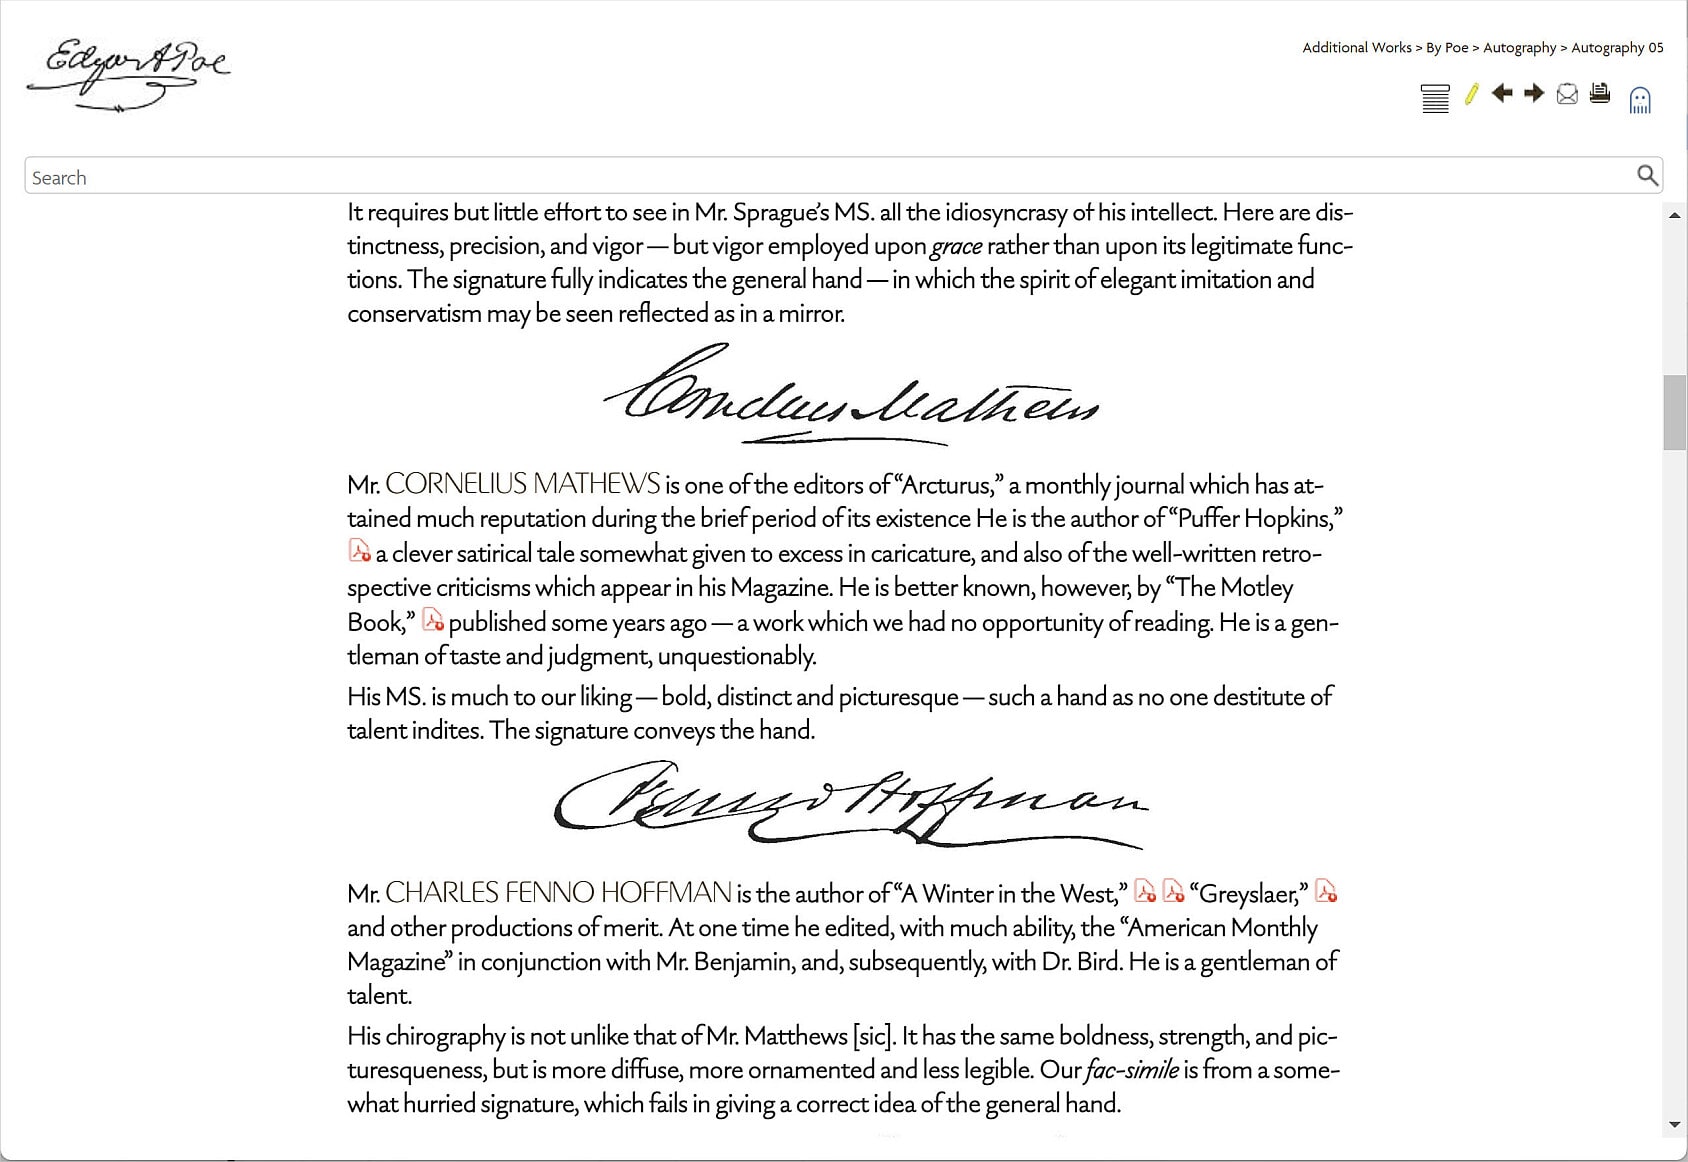
More relaxed.
Printing is unaffected by the ToC switch because the Contents frame is not sent to the printer.
How It All Works
The functionality for the ToC switch project is adapted from open-source code provided by Mattias Sander and a code review by Dave Lee, built upon a MadCap Flare “factory” project template. Mattias develops the Kaizen Plugin for Flare (www.kaizenplugin.com) and performs Flare automation services (www.improvementsoft.com). Dave is a major contributor of solid advice on the MadCap Flare forums and Slack channel, and is a trusted “go to” consultant for complex CSS schemes.
JavaScript
The toolbar JavaScript provided by Mattias Sander (the “.sidenav-wrapper” function) toggles the images and changes the display of the Contents when a user clicks an icon for the show/hide function. Mattias’s code comments are the lines that begin with //.
$(document).ready(function () {
    //Click/touch event triggered when you click the toc-off button
    $("button.toggle-toc-off-button").on("click touch", function () {
        //Show the TOC-on button:
        $("button.toggle-toc-on-button").show();
        //Hide the toc-off button:
        $(this).hide();
        //Hide sidenav:
        $(".sidenav-wrapper").toggle();
    });
    $("button.toggle-toc-on-button").on("click touch", function () {
        //Hide the TOC-on button:
        $(this).hide();
        //Show the TOC-off button:
        $("button.toggle-toc-off-button").show();
        //Show the sidenav:
        $(".sidenav-wrapper").toggle();
    });
});
Buttons
The style sheet defines the buttons, which receive the user input that is interpreted by the JavaScript:
button.toggle-toc-on-button .button-icon,
	button.toggle-toc-off-button .button-icon
	{
		background-size: 20px !important;
	}
The term “.button-icon” tells the browser to treat the icon as a link. The background size of 20px is indeed important; without this statement, the icons will appear too large for their containers.
Icons
The icons are what the user sees as a “hot spot.” I use icons without text labels for a true minimalist look and to simplify translation.
This icon displays when the ToC is visible:
toc-shown.jpg
It resembles a newspaper or magazine layout with a banner.
This icon displays when the ToC is hidden:
toc-hidden.jpg
The horizontal lines mimic lines of text with a topic title above.
Starting from Scratch
(Beginners)
- Unzip the Show-Hide-ToC.flprjzip file linked here to open the project.
- Test build the project. See “Testing the Project” at the end of this article.
- Add in your own components and build, then test. Repeat as needed. Test often.
Modifying an Existing Project
(Experienced Users)
Follow the instructions below. We provide every step; skip what you don’t need. For example, you probably have defined a project template already.
Project Template
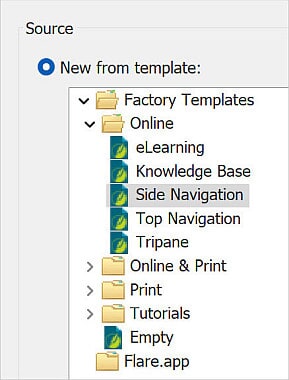
Use a MadCap Side Navigation factory template.
- Select New Project at the start page or File menu.
- Select the Side Navigation template:
- Select Next.
- The only available target option is HTML5. Select Finish.
Topic Toolbar
To save time and guarantee accuracy, reuse the Topic-Toolbar skin from the sample project.
- Unzip the Show-Hide-ToC.flprjzip file linked here.
- Copy the Topic-Toolbar skin from the Show-Hide-ToC project into your own project (Project > Skins folder).
- Note the ToggleTocOff and ToggleTocOn button entries in the Topic Toolbar Skin Editor:
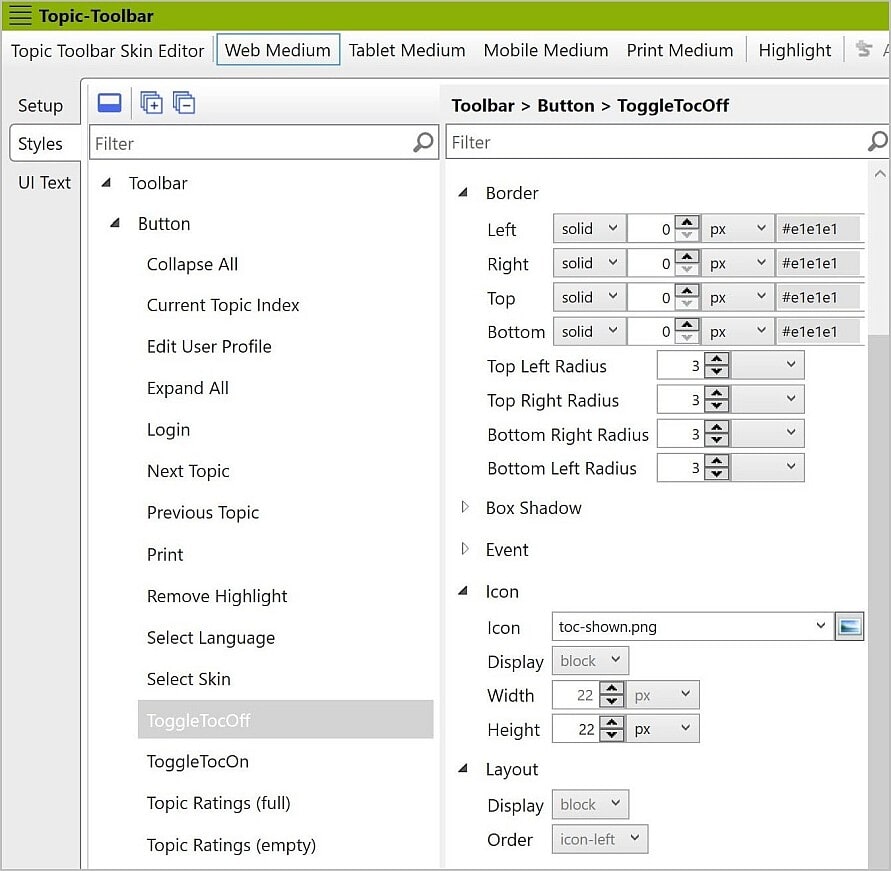
ToggleTocOff—The ToggleTocOff button uses a Display setting of “block” for Icon. The Layout is also set to display as “block.” This is correct.
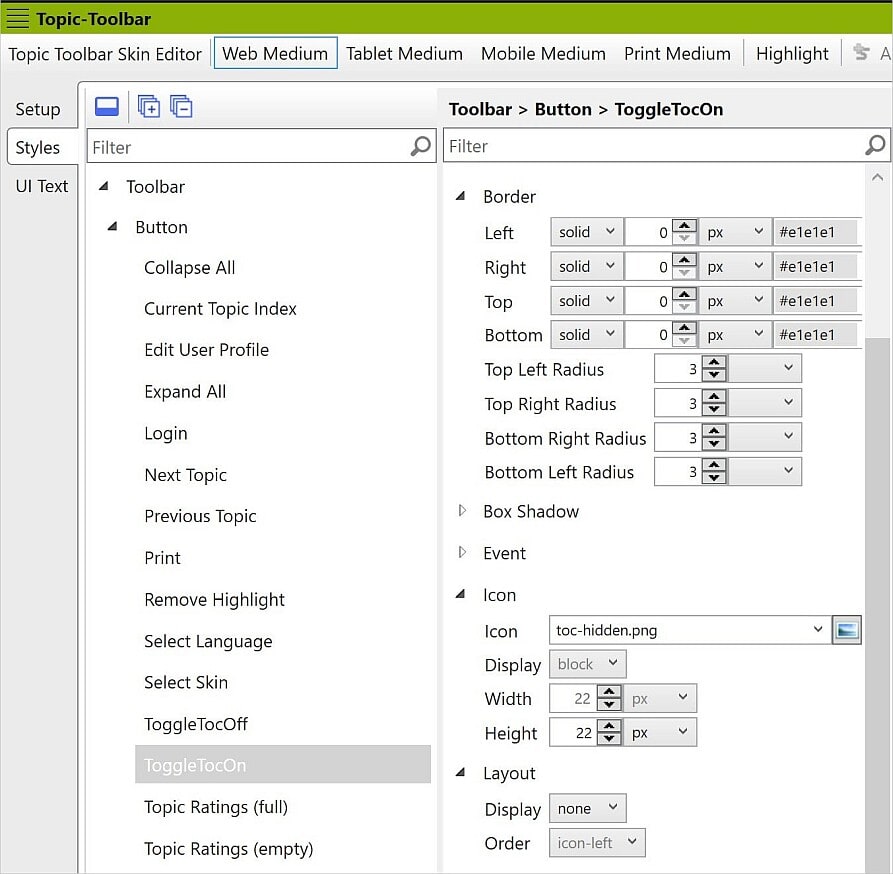
ToggleTocOn—Here the Icon’s setting for Display is “block” and the Layout display is “none.” This is correct.
- Close the file.
- Open your target file in the Target Editor, and be sure to select this as your skin in the Topic Toolbar dropdown:
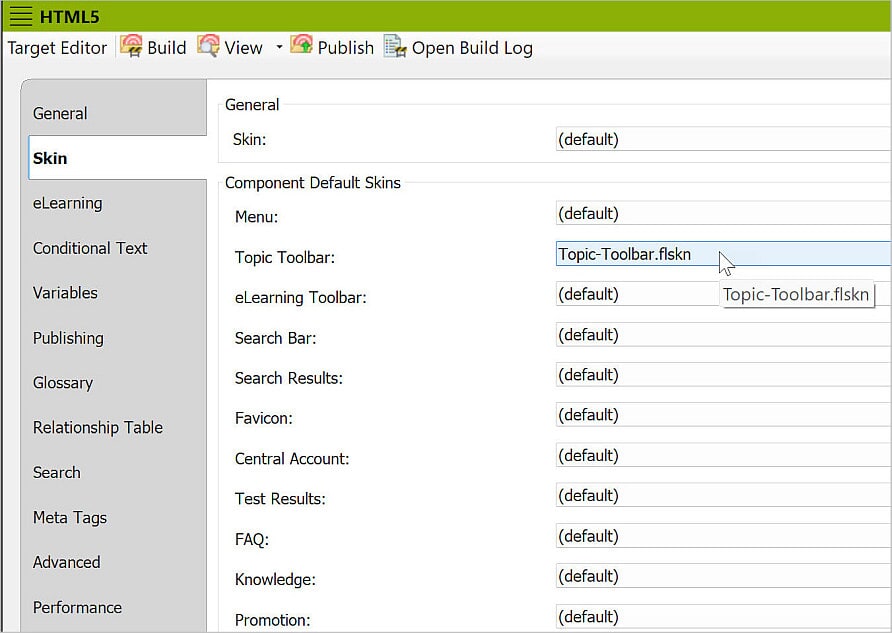
- Save and close the file.
Style Sheet
Although you could click through the Style Sheet Editor’s graphical interface for this task, a text edit to define the buttons is simple and quick.
- In text mode, copy and paste these lines (taken from the sample style sheet) at the end of your style sheet. Be sure to include the background-size statement:
/* Begin BUTTONS for Show/Hide ToC  */

button.toggle-toc-on-button .button-icon,
button.toggle-toc-off-button .button-icon
{
	background-size: 20px !important;
}

/* End BUTTONS for Show/Hide ToC  */
- Save and close the file.
Template Page
Add a proxy for the custom toolbar skin to your template page. The sample uses Other-Topics.flmsp (Resources > TemplatePages > Other-Topics.flmsp).
- Position the cursor at the beginning of the template page file and select Insert > Proxy > Topic Toolbar Proxy:

- It may be possible to use “(default)” in your case, but I always specify the name:
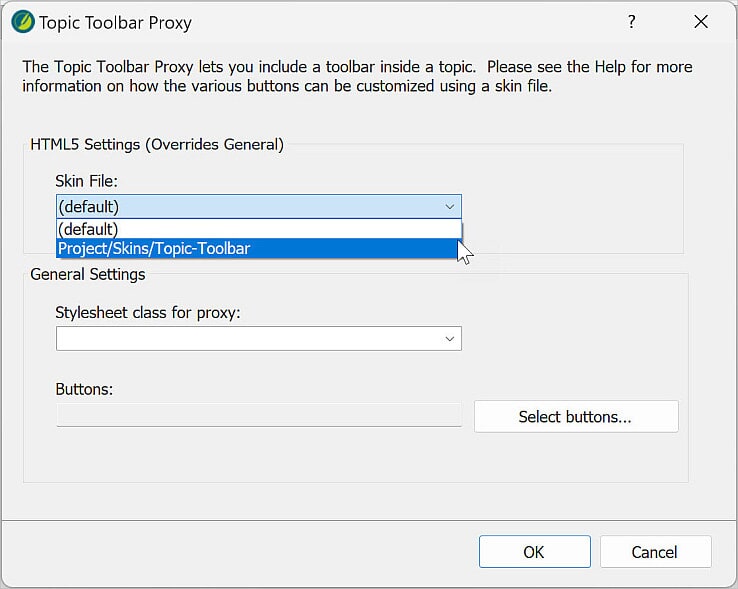
- You do not need to select or edit the buttons here. Click OK.
- Save the file. The finished file should look like this in the XML Editor:

- Close the file.
Testing the Project
- Build your HTML5 target and your output should show the ToC Show/Hide icons at any page that uses the Other-Topics template page, i.e., all but the home page in our sample. Remember that the icons will not appear if you shrink the screen size below the Tablet or Mobile breakpoints:
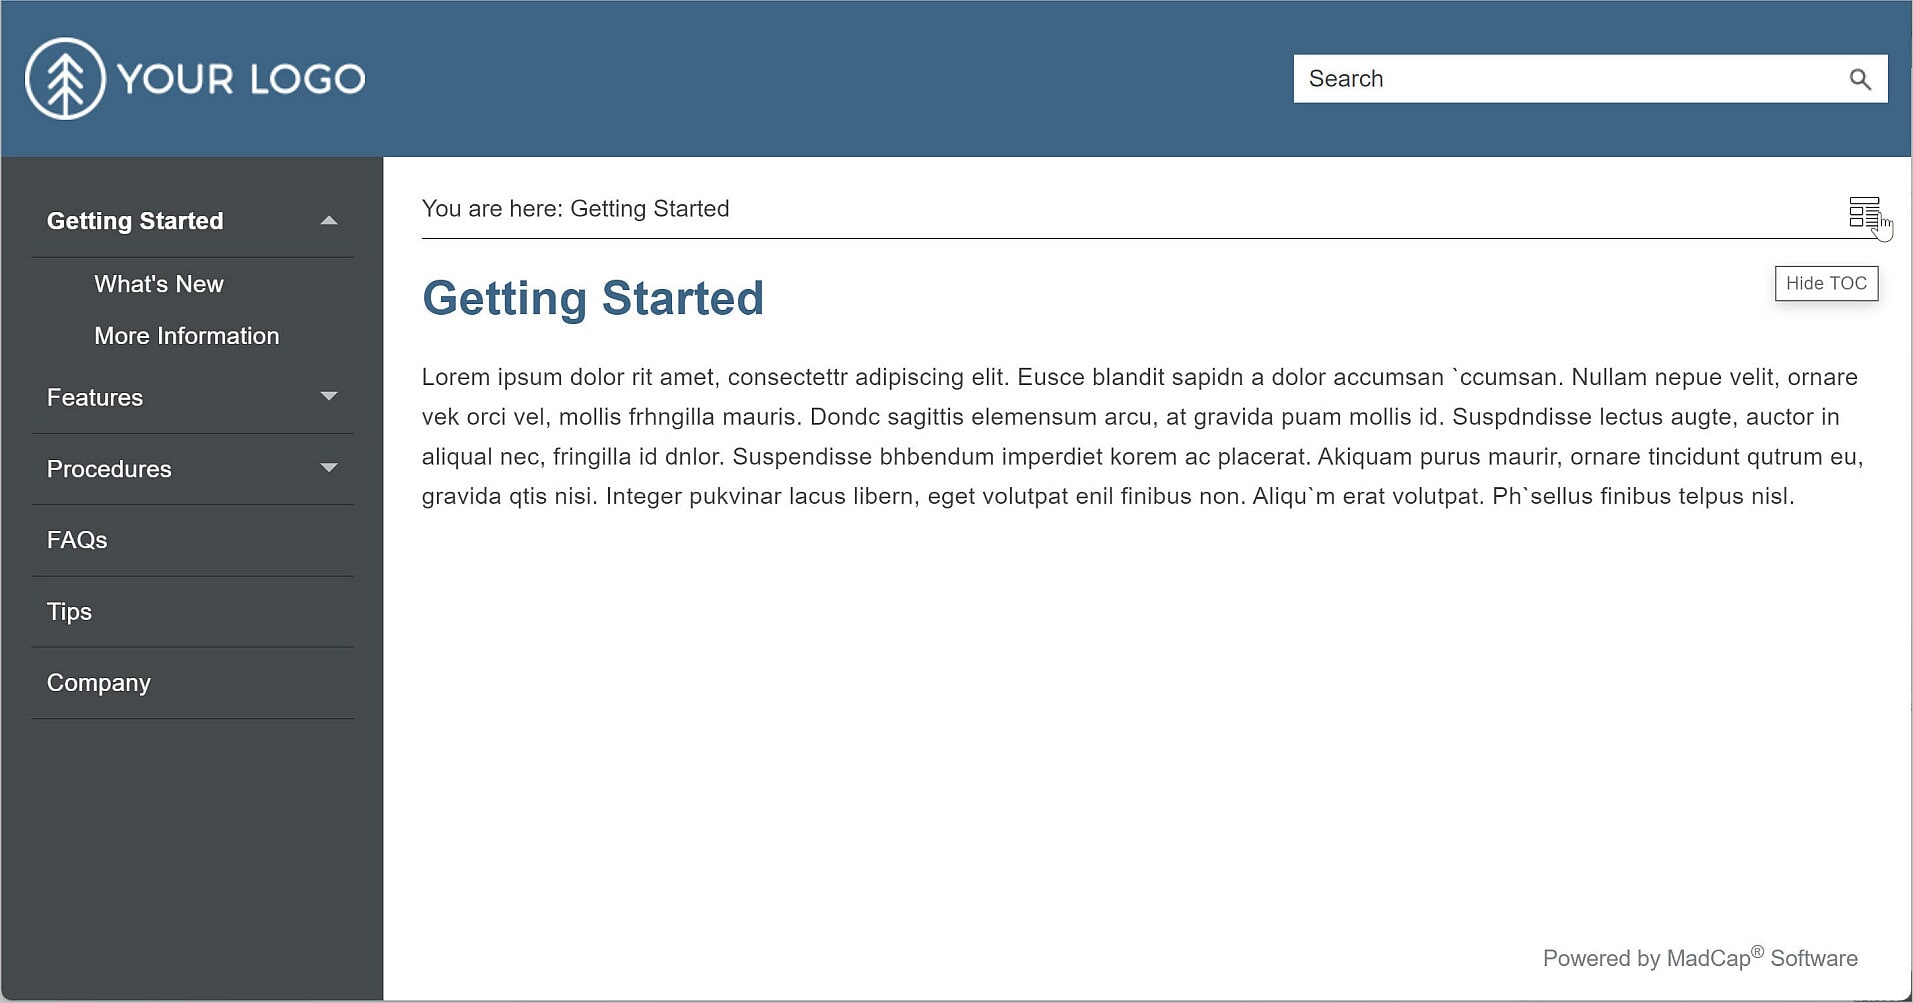
- Select the ToC icon once, and the layout changes to:
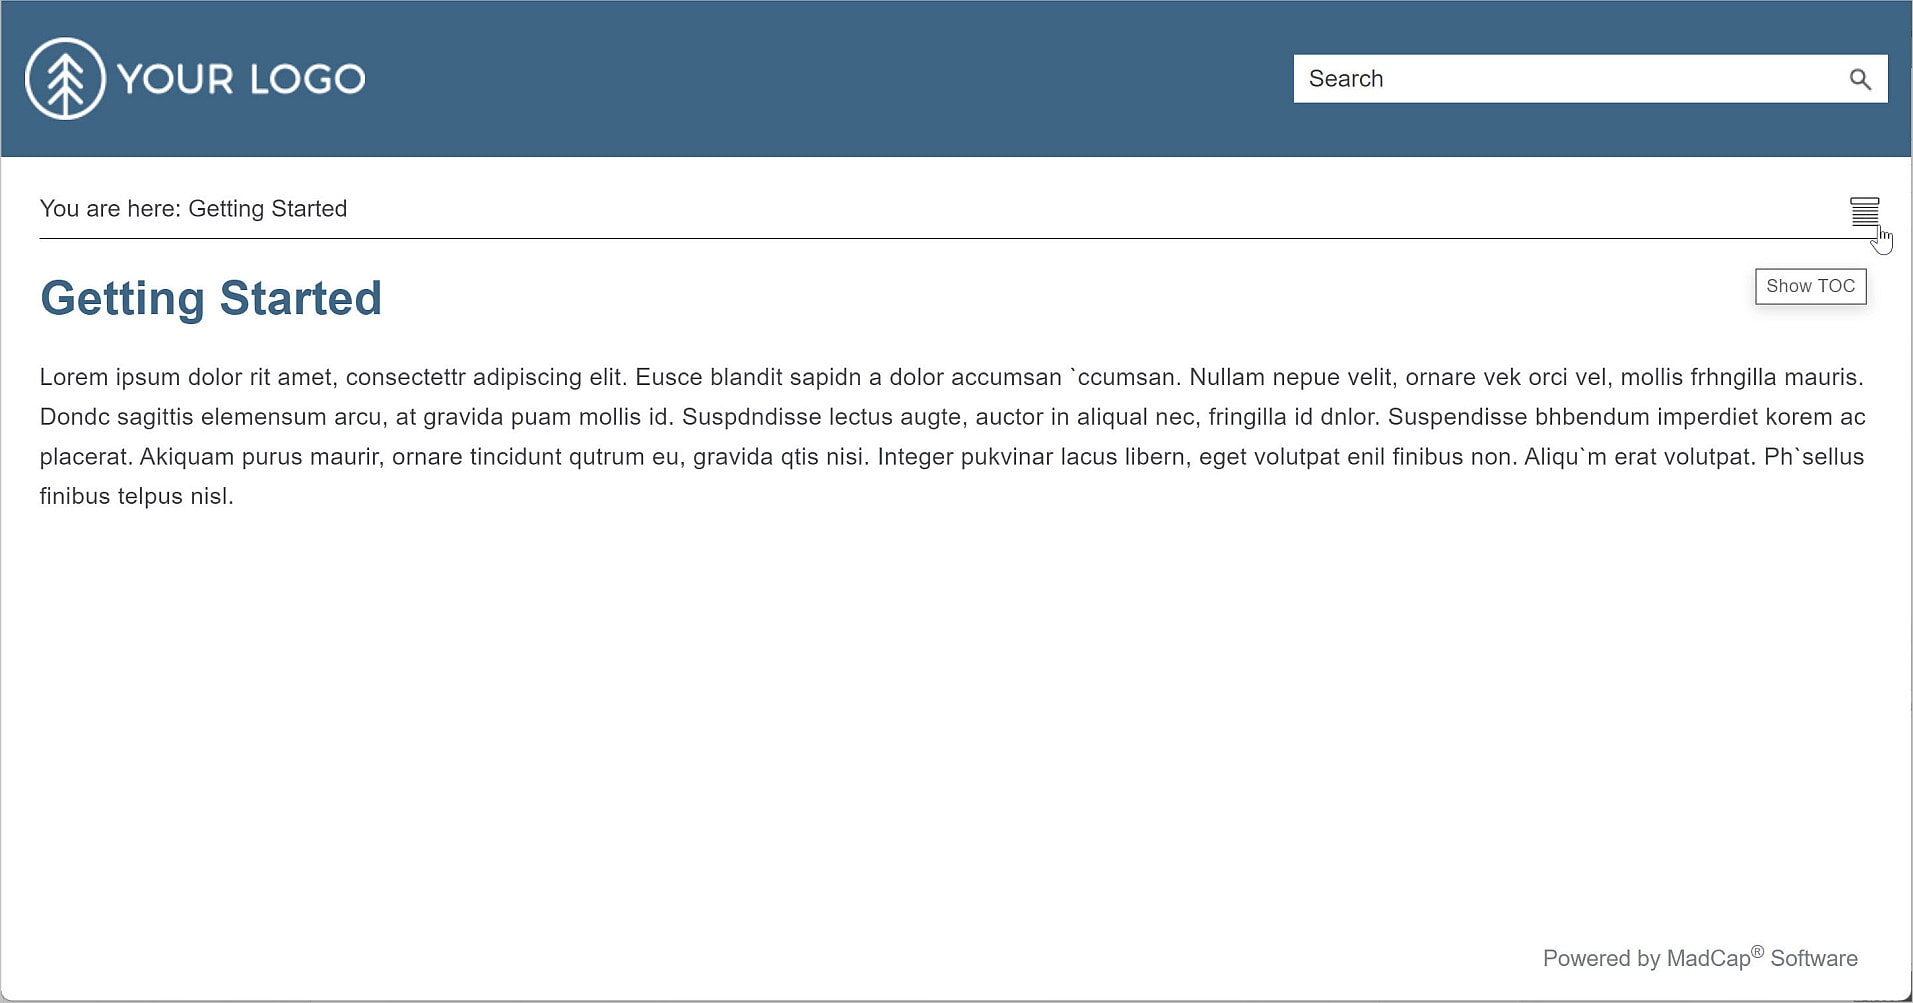
It’s fun to switch, and the buttons never wear out!


