You inherited a MadCap Flare project that looks like a complete mess. Someone imported a Word document into Flare ages ago, fixed some stuff here and there to make the output decent enough, and then left the company. The project faded into oblivion. Now, the time has come to bring it back to life and publish new deliverables.
This article doesn’t aim to be an exhaustive list of actions that you need to take to make your project work again. Projects are very different in terms of configuration and sometimes have very specific requirements. The goal of this post is to provide you with a general action plan for fixing a Flare project, to give a clue where you should start. Feel free to modify this plan as necessary.
1. Create a Backup
It’s always a good idea to back up your files before starting major work on them. The same works here - before you start fixing your project, make a backup in case something goes wrong, for example, you delete too many things.
While fixing the project, a recommended best practice is to also back up the project on a regular basis. This way, you’ll have snapshots of the project at various stages. They may come in handy if you need to revert some changes.
The best solution to address these needs is to put the project under source control, like MadCap Central, Subversion (SVN) or Git. It’ll allow you to track all the changes that you make and revert them easier if needed. If you’re new to the concept of source control, talk to your IT admins or your dev colleagues, or for starters have a look at this explanation. If IT resources are slim, consider trying MadCap Central. It is really easy to use, and you can get going with source control yourself.
2. Get a Clean Start
The main elements in a Flare project are the Content and Project folders, and the project file, that is the file with the FLPRJ extension. In other words, these elements are required for a Flare project to work.
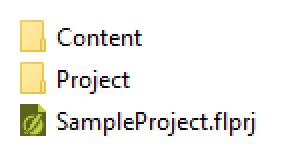
When you use certain features in Flare, additional temporary folders are created, like FileSync and MadCap Analyzer. If you see these folders, just delete them before opening the project in Flare. This way, you’ll get a clean start.
There’s another folder that you may want to delete - Output. It contains all the outputs that are generated from the project. If this folder doesn’t contain any relevant files, delete it as well. For more information on Flare folders, refer to this cheatsheet.
If you keep your project in source control, these temporary folders can be ignored. After doing so, you won’t commit them to the repo by mistake. For example, in SVN you can configure an svn:ignore property for this purpose. This step is not needed if the project was bound to source control using Flare. Flare binds the correct files for you.
3. Select the Default Settings
Your project is backed up, clean and ready for further configuration. Open it in Flare and carry on with the instructions below.
You can set up the default Table of Contents (TOC), Page Layout, and Stylesheet for your project in Project > Project Properties > Defaults.

It can save you time later on. For example, while creating a new target, you can leave the Stylesheet setting set as default if you use one Stylesheet for the entire project.
4. Delete Unnecessary Project Elements
More often that not, we keep adding elements to the project but rarely have time to review and delete what isn’t needed anymore. There’s a great chance that the project you’re trying to fix contains obsolete files. Have a look at targets, destinations, dictionaries, reports, skins, variable sets, and topics, among others. If it isn’t obvious which elements should be deleted, Flare reports can come to the rescue.
Follow the steps below to look for unused elements:
- Go to Project Organizer.
- Right-click Reports and select Add Report File.
- Select the Empty Report template, give your report a name, e.g. “Unused Elements” and select Add.
- In the Report Editor window, I suggest selecting these options:
- Unused Bookmarks
- Unused Condition Tags
- Unused Content Files
- Unused Images
- Unused Snippets
- Unused Styles
- Unused Variables
- Select Generate and then select Open in Browser.
- Analyze the results and remove elements accordingly.
Tip: If you have Analyzer, you can run the same scans, multiselect the files that are unused, and delete them all at once. Saves time and quite a few clicks.
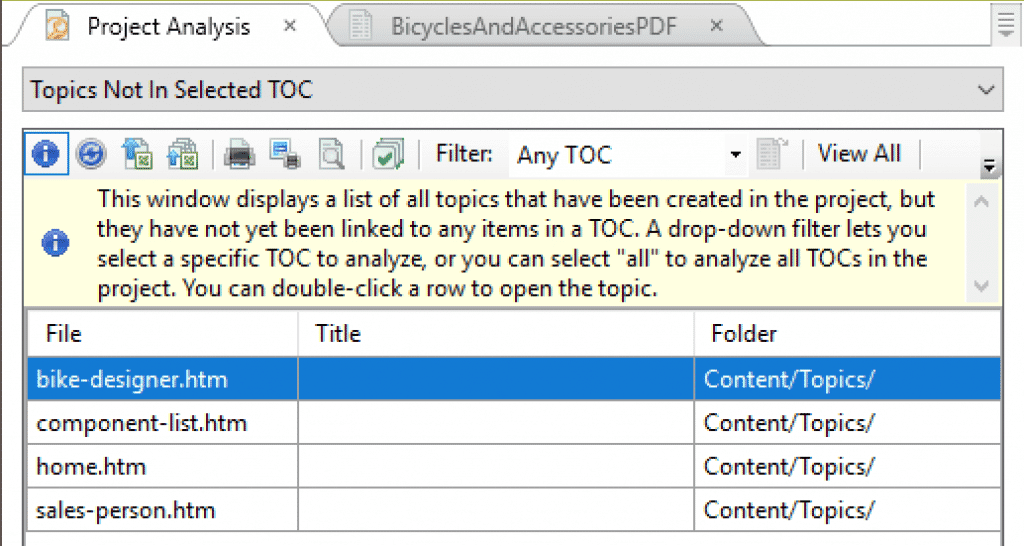
Additionally, you can go to View > Project Analysis > Topics Not in Selected TOC. Next, select the TOC you wish to analyze from the Filter menu. This dynamic report allows you to see which topics aren’t used in particular TOCs. It may be helpful in deciding which topics you don’t need anymore.
One more thing that you can do is get rid of redundant bookmarks. When you import a Word file that had a TOC in a Flare project, all the headings that are pointed to in the generated TOC will get a bookmark named “_TocXXX”, for example “_Toc229539249”. Very often, you can delete these bookmarks to make your links cleaner. For more information on how to find them, refer to the Finding specific bookmarks section of this article.
5. Clean Up Import Files
You may have a lot of unnecessary import files, especially if the project was created from several Word files that were imported into it. You can find the import files in Project Organizer > Imports.
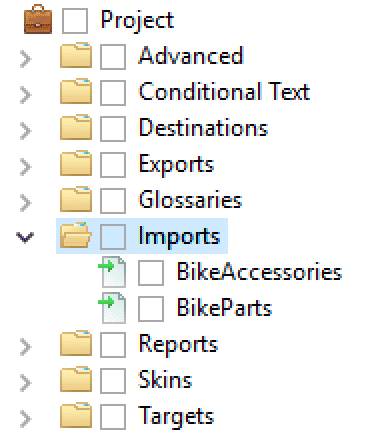
If you need to delete an import file, first open it and check if the Link Generated Files to Source Files option is selected.
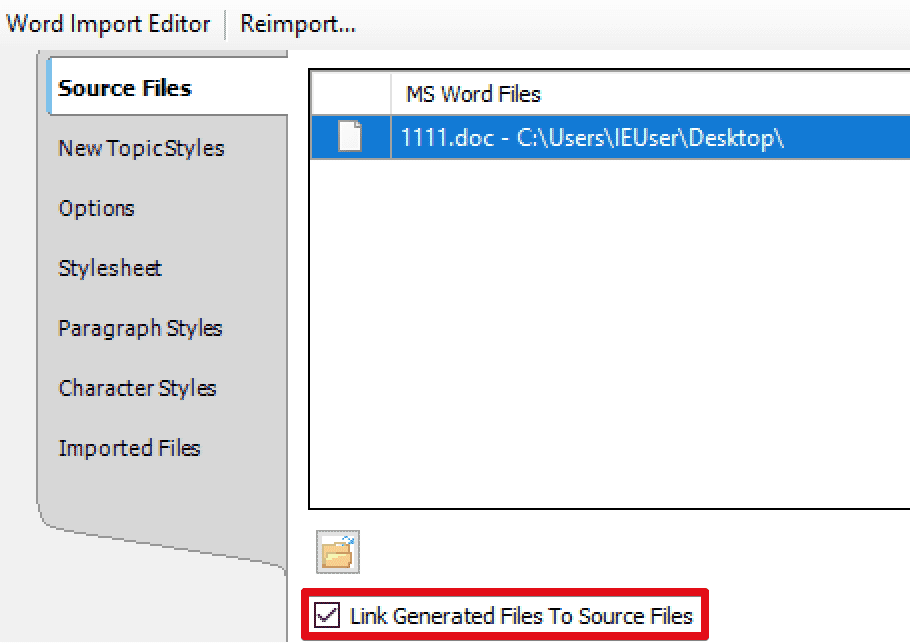
If it is selected, all the topics imported via this import file have a reference in their code to the source Word document. Unfortunately, removing the import file doesn’t automatically remove these references from the imported topics. Here, you have two options.
The first one is to leave the references for now. Keep in mind that some files will show a small chain icon, suggesting that they are still linked to the source file (but in fact they won’t be).

When you edit such a file, Flare will ask what you want to do with the fact that the file is linked. One of the options is to save changes and remove the link. After selecting this option, the reference to the source file will be removed from the file code. This option may be good if you don’t have too many imported files.
The second option is to search for the references in the source code of the files and then remove them. Go to the import file that you want to delete and in the Source Files section check the name of the source file. Next, open the Find and Replace in Files window and refer to the Finding links to source files section of this article for information on how to set up the search criteria. After you are done with the references, you can remove the import file.
For more information on import files for Word documents, refer to Flare’s online Help on Importing Word Files.
6. Fix the Table of Contents (TOC)
The next area where you should look is your Table of Contents. When examining the TOC, look for the following:
- Check for broken links, that is entries linking to files that don’t exist anymore. Flare indicates a broken link with this icon .
- Remove unnecessary entries.
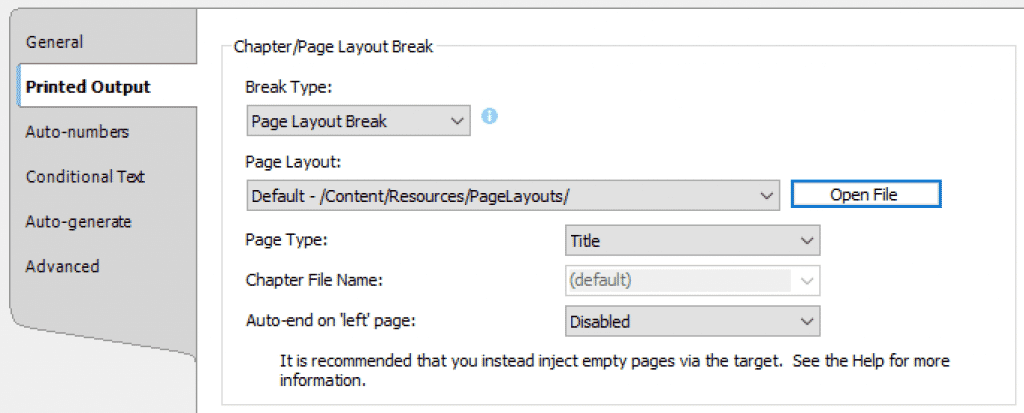
- Make sure a proper Page Layout is assigned to each entry. You can check the settings by right-clicking an entry and going to Properties > Printed Output.
7. Get Rid of Undefined Elements
While working on a Flare project, you may find that a removed element is still referenced in some places. For example, you may be using a condition tag for some time and then delete it without updating all the places where it’s applied. After doing so, the condition tag is seen by Flare as undefined. The same thing may happen with styles and variables.
To identify undefined elements in your Flare project, use reports. Create a new report the same way you did in Step 4 and select the following options:
- Undefined Condition Tags
- Undefined Styles
- Undefined Variables
If any items came up on the report, fix them.
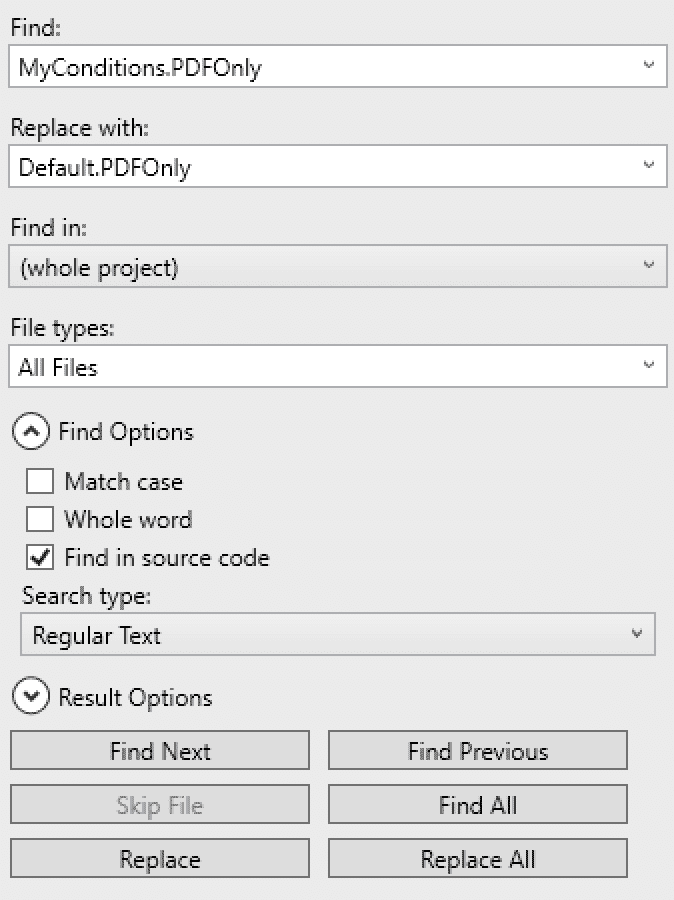
You can either address each issue separately or fix them in bulk. For example, you may have an undefined condition tag named “PDFOnly” that was originally defined in the “MyConditions” set. This tag doesn’t exist anymore but now you have a condition tag with the same name but defined in the “Default” set. To fix all the instances of the undefined condition tag, open the Find and Replace in Files window, type in “MyConditions.PDFOnly” in the Find field and “Default.PDFOnly” in the Replace with field. Select the Find in source code option, make sure Search type is set to Regular Text and Find in to (whole project), and hit Replace All.
This is another area where Analyzer can help. It can find and make it easy for you to fix these things. If you don’t have Analyzer, these reports are the next best thing to optimize your Flare Project.
8. Adjust Targets
The next step is to verify settings in your targets.
General Settings
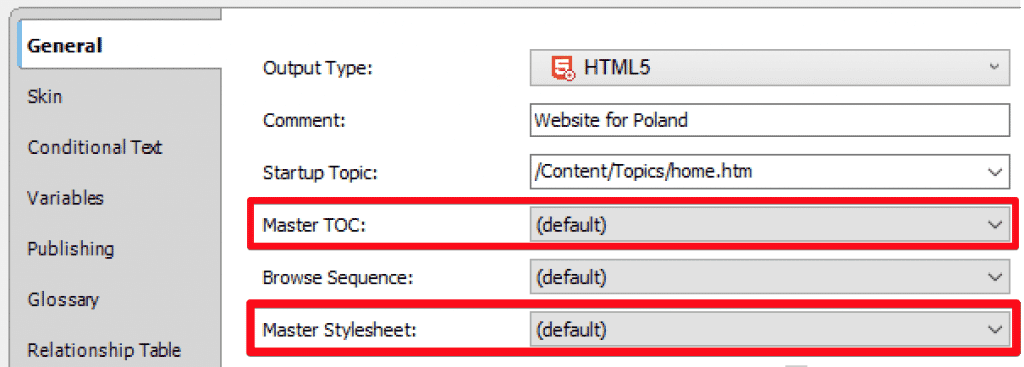
If you have HTML5 and PDF targets, start in the General section. Check that the master TOC and stylesheet are set up properly. If you want to use the default TOC and stylesheet (addressed om Step 3), just set these options to (default).
Conditions
Next, go to the Conditional Text section and make sure that proper conditions are included and excluded. It’s very important to get them right because conditions determine what content will land in the generated document.

Variables
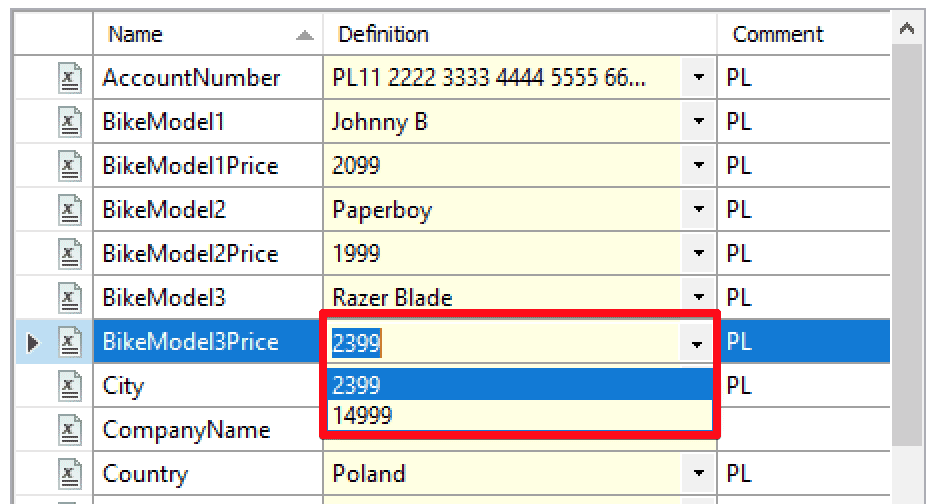
After you get the conditions right, move on to variables. Check if the variable values in the target are correct. If the project uses multiple-definition variables, it’s possible that someone selected an incorrect value here and there. When multiple definitions are available for a variable, you see a drop-down menu next to the variable value. Just open the menu and make sure the selected value is the one you want.
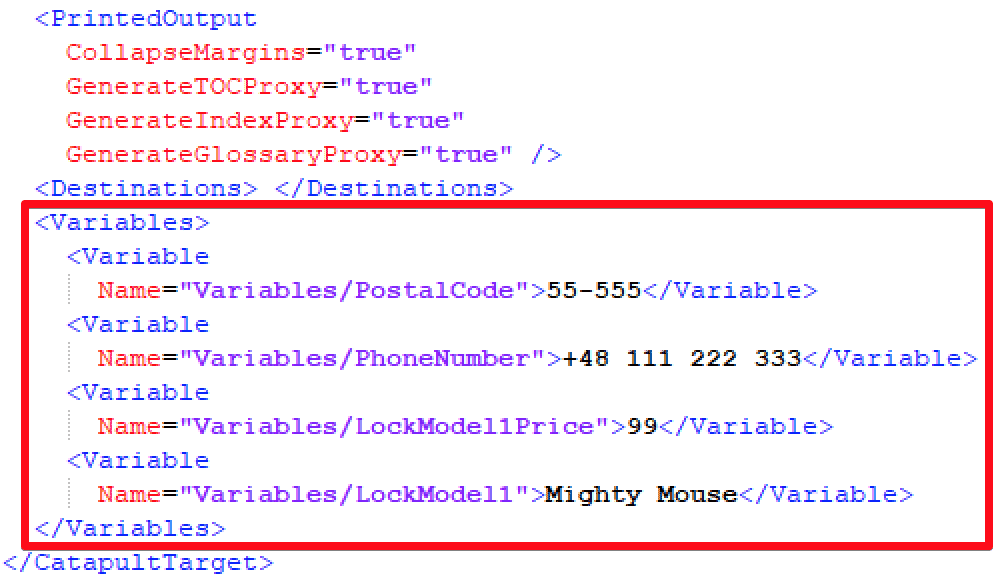
Identifying manual variable overrides requires a bit more work. The fastest way to find all manual overrides in a Flare target (that I know) is to open the target file in a text editor and look at the <Variables> tag. If it has some <Variable> tags in it, it means that overrides are used (each override has its own <Variable> tag). The Name attribute will tell you which variable is overridden. If the <Variables> tag is empty, there are no overrides.
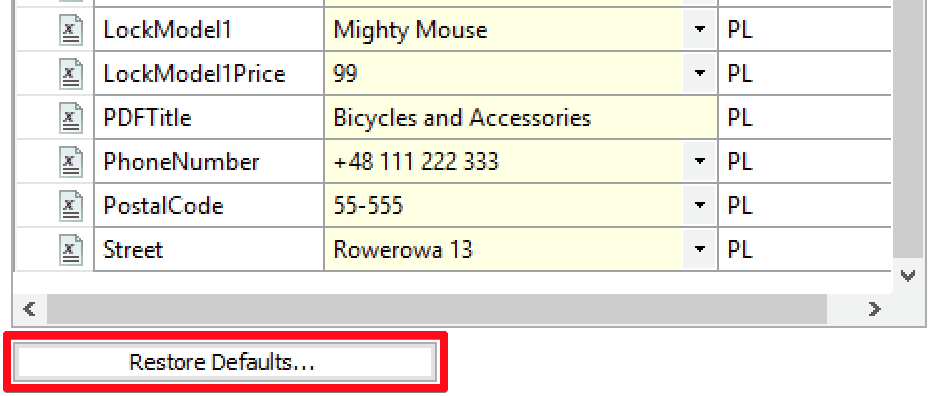
In case the project has a relatively small number of variables, you may find it easier to reset the values in the target to defaults to start fresh and then apply correct values manually.
Additional Checks
Optionally, you may want to check some settings that are output-specific.
For HTML5 targets, have a look at Startup Topic in the General section. It defines which topics the users see first after opening the HTML documentation. After that, go to the Skin section and check that the right skin, and skin components are selected. The skin determines the overall layout of your HTML documentation.
For PDF targets, check Master Page Layout in the General section. This setting defines how the pages in your PDF targets are structured. If you aren’t happy with the file name of the generated PDF, adjust it in the Output File field. After that, move on to the PDF Options and check Document Properties. This information is available in the properties of the generated document so make sure it’s right.

Document Properties in the Flare target
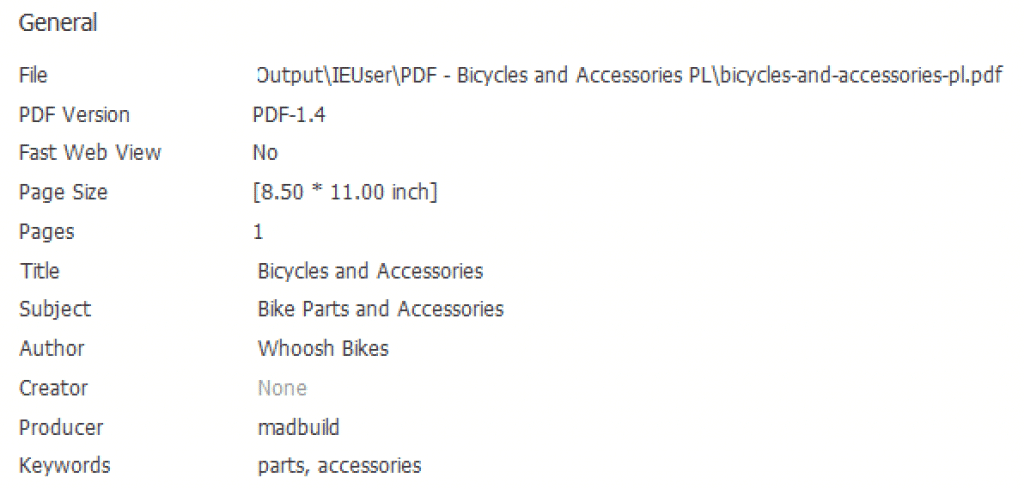
Document properties in the generated PDF
9. Run Builds and Troubleshoot
Finally, you’re ready to build your documentation. But it doesn’t mean that the work is over.
Run your target by right-clicking it and selecting Build. After the build is finished, go to the Builds window and check if any errors and warnings occurred. Select the build you want to check from the list and click Open Build Log.

In the Log File window that opens, check the Errors and Warnings tabs.

Fix the found issues. The information in the log is quite descriptive, so you should be able to identify where the problem lies. Two quick tips:
- Double-click a log entry to open the item where the issue was found.
- You can decide which errors and warnings to see while building outputs. If there is still something wrong with your document but you can’t see anything in the log or the log file is too cluttered, you may want to adjust the error and warning settings. For instructions, see MadCap documentation.
Enjoy the Fixed Project
I hope that all the steps provided above helped you bring your project back to life. Once you're happy with the result, upload the fixed project to its final location. And take a break to enjoy the final result - a clean, updated MadCap Flare project.


