This guest post was written by Nita Beck, a MadCap Flare consultant and owner of Nita Beck Communications, offering technical communication and information architecture services, including Flare project design and customized Flare training.
MadCap Flare is the leading solution to create modern self-service support and online Help sites, documentation portals, learning centers, training guides, knowledge bases, policy & procedure manuals, and more – all while maximizing content reuse and leveraging multi-channel publishing capabilities. This blog post, intended for new MadCap Flare users, covers:
- The benefits of using cascading stylesheets (CSS) in Flare projects
- The high-level steps for creating a stylesheet and associating it at the project, target, or topic level
- The many resources available for gaining Flare skills and CSS expertise
Why use Stylesheets to Control Content Formatting?
A CSS controls formatting uniformly across a body of HTML content. Because the presentation of content is kept separate from the content itself, one can quickly roll out formatting changes across a set of files. One can even swap out one stylesheet for another to completely change the presentation of content in an HTML document, provided that both stylesheets have the same-named styles.
Now, Flare doesn’t prevent you from formatting content right in a topic or snippet. For example, you could make a couple of words bold and red to give them emphasis. This style element adjustment is known as inline formatting. Imagine that you used inline formatting hundreds of times throughout a project. And maybe you were inconsistent. Sometimes you specified bold, then red. Sometimes you specified red, then bold. If you later changed your mind and wanted these bits of content to be italic and red, you’d have to search for all the individual instances and manually make that change.
Now imagine that you have a stylesheet in which you’ve defined a span.Emphasis style to supply the bold and red formatting and that you’ve applied that span style throughout the project. Want to swap in italics for bold? Just modify the definition of span.Emphasis and you’re done!
Important Stylesheet Terminology
Flare’s stylesheets are cascading stylesheets, an international standard developed by the World Wide Web Consortium. Some CSS terms you’ll need to know include classes, selectors, spans, and mediums. In particular, mediums drive the formatting of different kinds of outputs, such as PDFs vs. web pages. Mediums even control the responsiveness of web page content built with HTML code, changing how it's formatted depending on the device and screen size on which it’s viewed. We’ll discuss mediums a little more later.
But for now, let’s return to Flare.
Where Stylesheets Reside in Flare
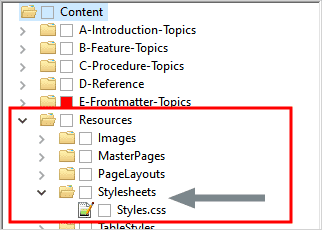
Every Flare project must have at least one stylesheet. There’s no hard rule about where a CSS file must be stored. But in a typical Flare project, you’ll find them in the Content Explorer in Resources\Stylesheets.
Stylesheets folder in a project based on the built-in Side Navigation and PDF template.
Adding a New Stylesheet
My habit when adding a new stylesheet is to right-click the Resources\Stylesheets folder, select New > Stylesheet, and click Add. This way, I don’t accidentally have Flare put the stylesheet someplace else because I didn’t pay close enough attention to the folder location.
Editing a Stylesheet in the Stylesheet Editor
You can edit a stylesheet in any number of ways. I suggest that new Flare users – especially those new to the whole idea of CSS – begin by working in the Stylesheet Editor.
To open a stylesheet in the Stylesheet Editor, just double-click it.
The editor has two views: Advanced and Simplified. I typically work in the Advanced view. I also typically filter the editor to see only styles of a certain type (such as heading styles).
I also typically elect to view multiple mediums simultaneously so I can easily see where differences are and can ensure that I edit in the right medium. A medium is an alternative group of settings in a stylesheet and can be very useful when you are generating multiple kinds of outputs. One use for a medium is to have one group of style element settings for online formats and a different group of settings for print-based formats, all for the same content.
TIP: Some users swear that they’ve edited a style, but then don’t see that change reflected in the formatting of their content when they build their output. Usually, they’ve made the “newbie” mistake of editing in the wrong medium.
Stylesheet Editor showing only heading styles and all mediums.
To edit a style, expand the property group (e.g., Font) and then define its properties as desired.
I’ve given you the briefest peek at the Stylesheet Editor, and there’s much more to learn, including some of the primary tasks that you can perform: add comments, create and edit CSS variables, manage font sets inclusive of font size and family, and create and rename selectors, such as a class selector or ID selector. Check out the Flare Help to learn more about the Stylesheet Editor.
Editing a Stylesheet by Hand
Once you’re comfortable with stylesheets, you may prefer to edit a stylesheet’s code directly. One way is to open the stylesheet in Flare’s Internal Text Editor. Right-click the stylesheet and select Open With > Internal Text Editor. Alternatively, select an external text editor. My favorite is Notepad++.
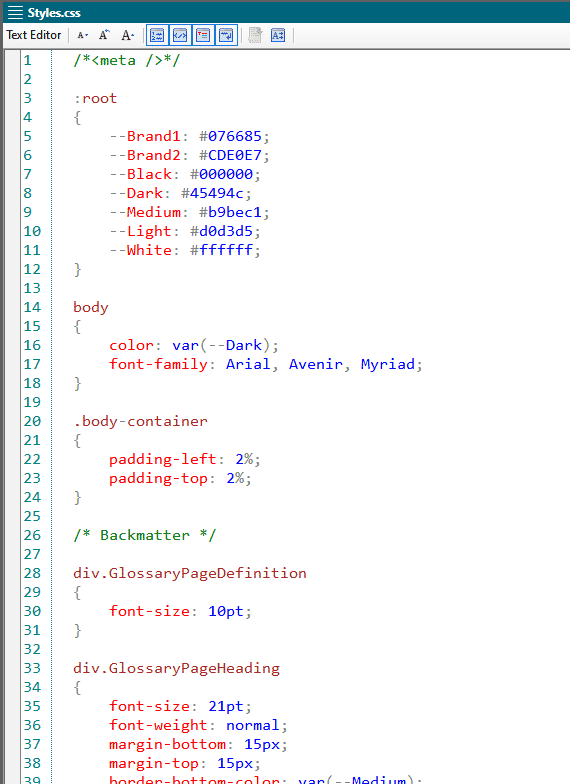
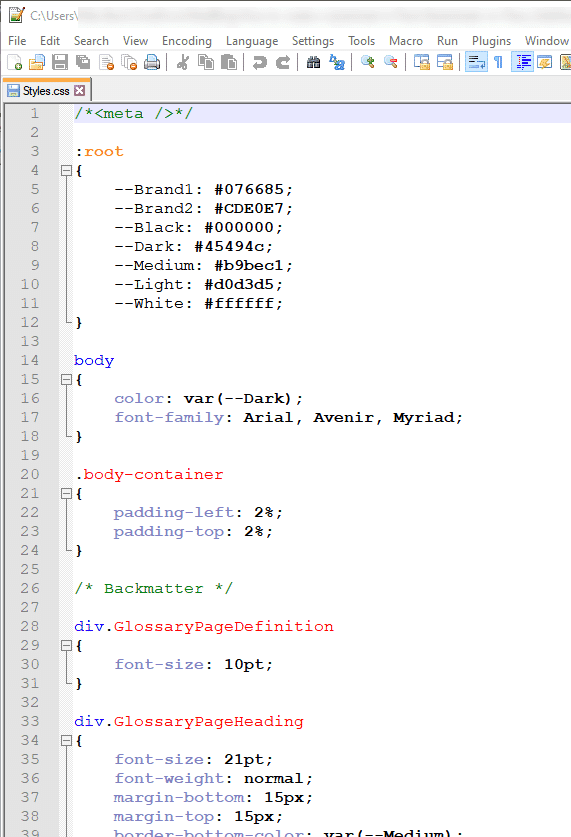
If you edit a stylesheet by hand, be careful with syntax. A missing semicolon or closing curly bracket/brace will cause Flare not to be able to interpret the stylesheet correctly. My practice, after editing by hand, is to open the stylesheet in the Stylesheet Editor. If Flare detects invalid syntax, it will tell me what and where the invalid syntax is and will prompt to open the stylesheet in the Internal Text Editor.
Associating a Stylesheet With a Target or With Individual Topics
It’s not enough to add a new stylesheet to a project. Just because it’s there doesn’t mean Flare will use it to format content. You must associate your CSS document with one or more topics, with one or more targets, or even with the entire project.
Let’s take these in reverse order.
- If you plan to have all or most topics in your project use the same stylesheet, make it the default at the project level. Select Project > Project Properties > Defaults and specify the stylesheet there. This default stylesheet will be inherited by (used by) all targets and topics. Notice that you can select Allow local stylesheets in case you plan to have a second stylesheet for some specific use cases.

- If you don’t have a project-level stylesheet (or if you elected to allow local stylesheets), you can associate a stylesheet at the target level. This means that all topics included in that target’s output will be formatted by the target’s associated stylesheet. Here, too, you can elect to allow local stylesheets.
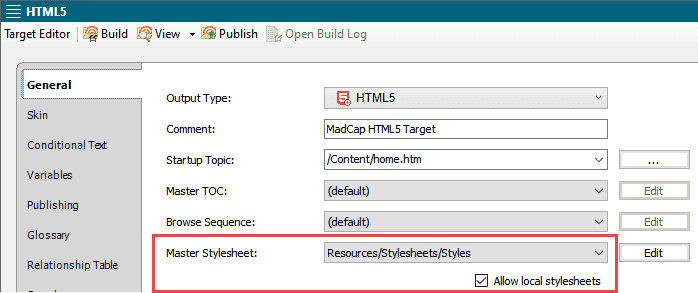
- Finally, if needed, you can associate a stylesheet with an individual topic by editing the topic’s properties. I don’t typically do associate stylesheets at the topic level, except for special situations. For example, if I have a home page in HTML5 output that needs unique styles from all other topics, I associate it with a stylesheet intended only for it.
Where to Learn More About CSS and About Flare’s Stylesheets
If you’re brand new to cascading stylesheets, I suggest you check out the many industry resources, particularly the CSS Tutorial at w3schools. You can play with the demo stylesheets here. As you explore the many CSS reference articles, practice with the Try It Yourself feature.
MadCap Software offers a series of videos about Flare and CSS as well as recorded webinars and blogs on the topic, such as “How to Use CSS to Manage Lists.”
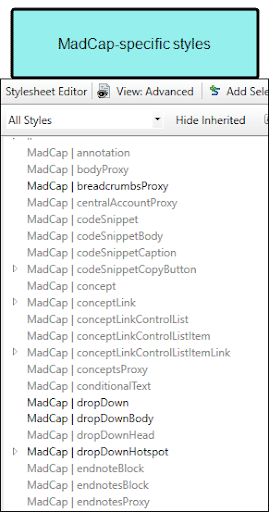
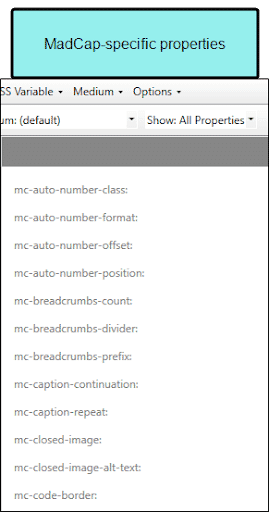
And be sure to check out Flare’s Help system. In particular, learn about the MadCap Software-specific styles (which begin with “MadCap”) and properties (which begin with “mc”, such as “mc-auto-number-format”) here.
With the MadCap Software-specific styles and properties, you can harness a lot of Flare’s power!
