A filter can be included in the search in the output to let users narrow their search based on "concepts" that you have inserted into topics. Concepts are simply markers that you insert into topics that have some kind of relationship with each other. They are also used for inserting concept links into topics (such as the "See Also" links).
Let’s say you have a project that contains topics referring to “Numbers", "Letters" and "Colors”. When your user searches for content in the output, the search can potentially find matches in all of the topics in the project containing information on Numbers, Letters and Colors. Search Filters allow your user to select a ‘concept’ from a drop-down to automatically narrow the search down to content containing only the information that they need.
This feature is supported in DotNet Help, WebHelp, AIR and HTML5 outputs.
How To Do It
The steps to include Search Filters in your output are pretty easy. The first thing that you will need is a project with some content. We have linked to a sample project that you can use to follow along: Search Filters Sample Project. Note: You will need to have Flare V8 installed to use this project.
Let's get the workspace set up to make things a little easier:
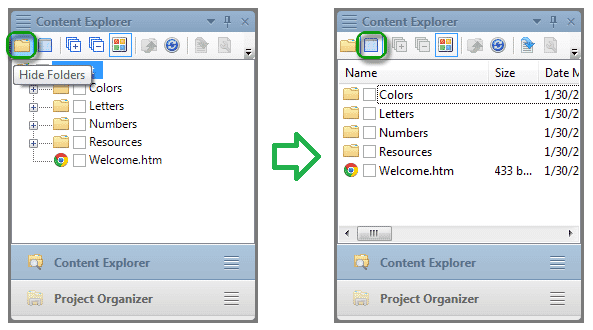
1 . View the Content Explorer in Files mode. To do this click on the Hide Folders button in the Content Explorer. Your Content Explorer should look like the image on the right:
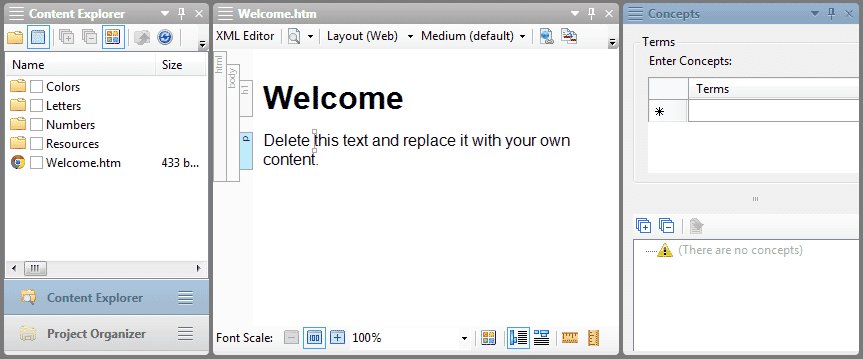
2. Then we want to view the Concept Window: View > Concept Window. Your interface should look something like this, the concept window is on the right:
Adding Concepts to Topics
Now that the interface is set up, you will want to start adding concepts to the project, then add them to the topics.
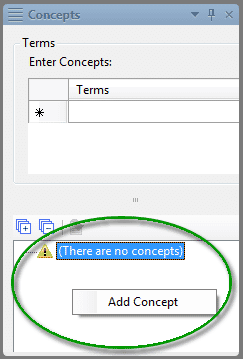
1. Right-click in the bottom pane of the Concepts Window and select Add Concept and name it "number".
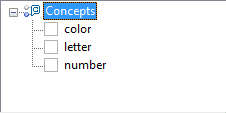
2. Repeat the above step and create two more concepts; one named "letter" and one named "color". The bottom pane of the Concepts Window should look like this:
3. In the Content Explorer (Files View), double-click the “Colors” folder. Use the [Shift] key to select all of the .htm files and drag them to the Concept Window concept “color”.
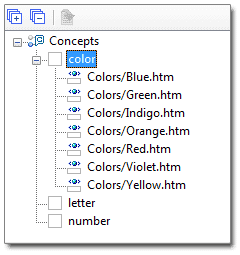
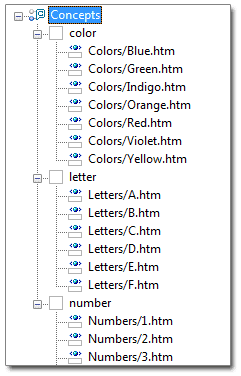
4. In the Content Explorer, click the Up button Up Button to go to the parent folder. Now double-click the “Letters” folder, select the topics and drag them to the “letter” concept in the Concept Window. Repeat for “Numbers”. Your Concept Window should look like this (you may have to click the “+” to see the topics assigned to each concept).
5. Save All…
in its’ toolbar.
Creating a Search Filter Set
1. Go to the Project Explorer and right-click on the Advanced Folder.
2. Select Add Search Filter Set
3. Name the search filter set "SFS" and click Add
4. Click on "My Subset" and type "Numbers"
5. Click in the Concepts column to the right of where you just typed and select "number".
6. Click the right arrow so that the concept "number" is moved to the Selected Concepts control and click OK.
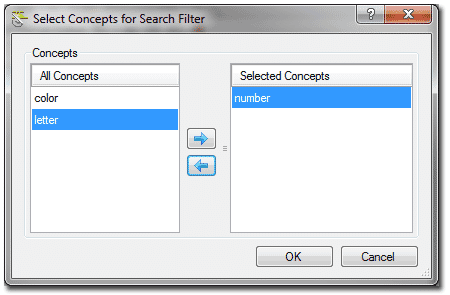
7. In the Search Filter Set Editor, click the New Item button (or right-click) and create a new Filter Name for "Colors" and assign it to the color concept as we did above for Numbers. Now create another for Letters and assign the concept letter. Your Search Filter Editor should look like this:
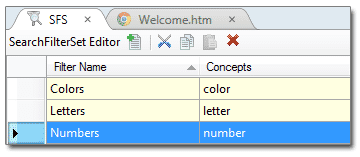
8. Save All…
Apply the Search Filter Set to the Target
- In the Project Explorer, open the Targets folder.
- Double-click the MyHTML5 target to open it in the editor
- Go to the Advanced tab and scroll down to the Search Filter section in the UI
- Select the search filter that we created in the steps above: "SFS"
- Save All...
Generate and View
Now that all of the setup is complete and the search filter set is assigned to the target, you can generate and view the results.
1. Using the output from this sample do a search for "replace". Notice that there are 19 results found.
2. Select the drop-down next to the search field and select "Numbers".
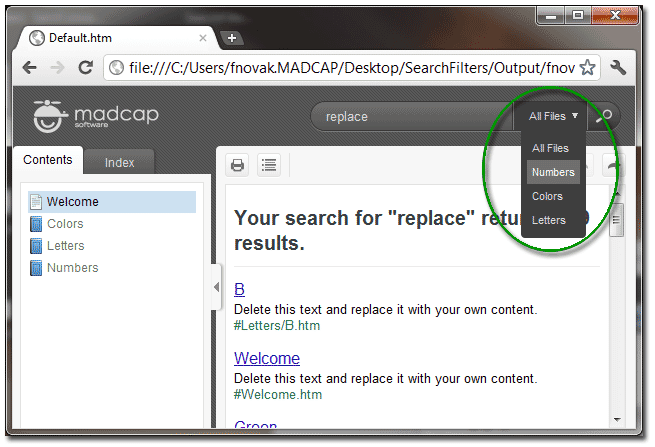
3. Notice that the results we filtered to just show the results that have the "number" concept assigned to it. It should show only 5 results, all of which are "Number" topics.


